> ## Documentation Index
> Fetch the complete documentation index at: https://docs.leapx-hub.com/llms.txt
> Use this file to discover all available pages before exploring further.
# Kilo Code 插件(VS Code)
> Kilo Code for VS Code 插件安装与配置指南
## 第一步:安装 Kilo Code 插件
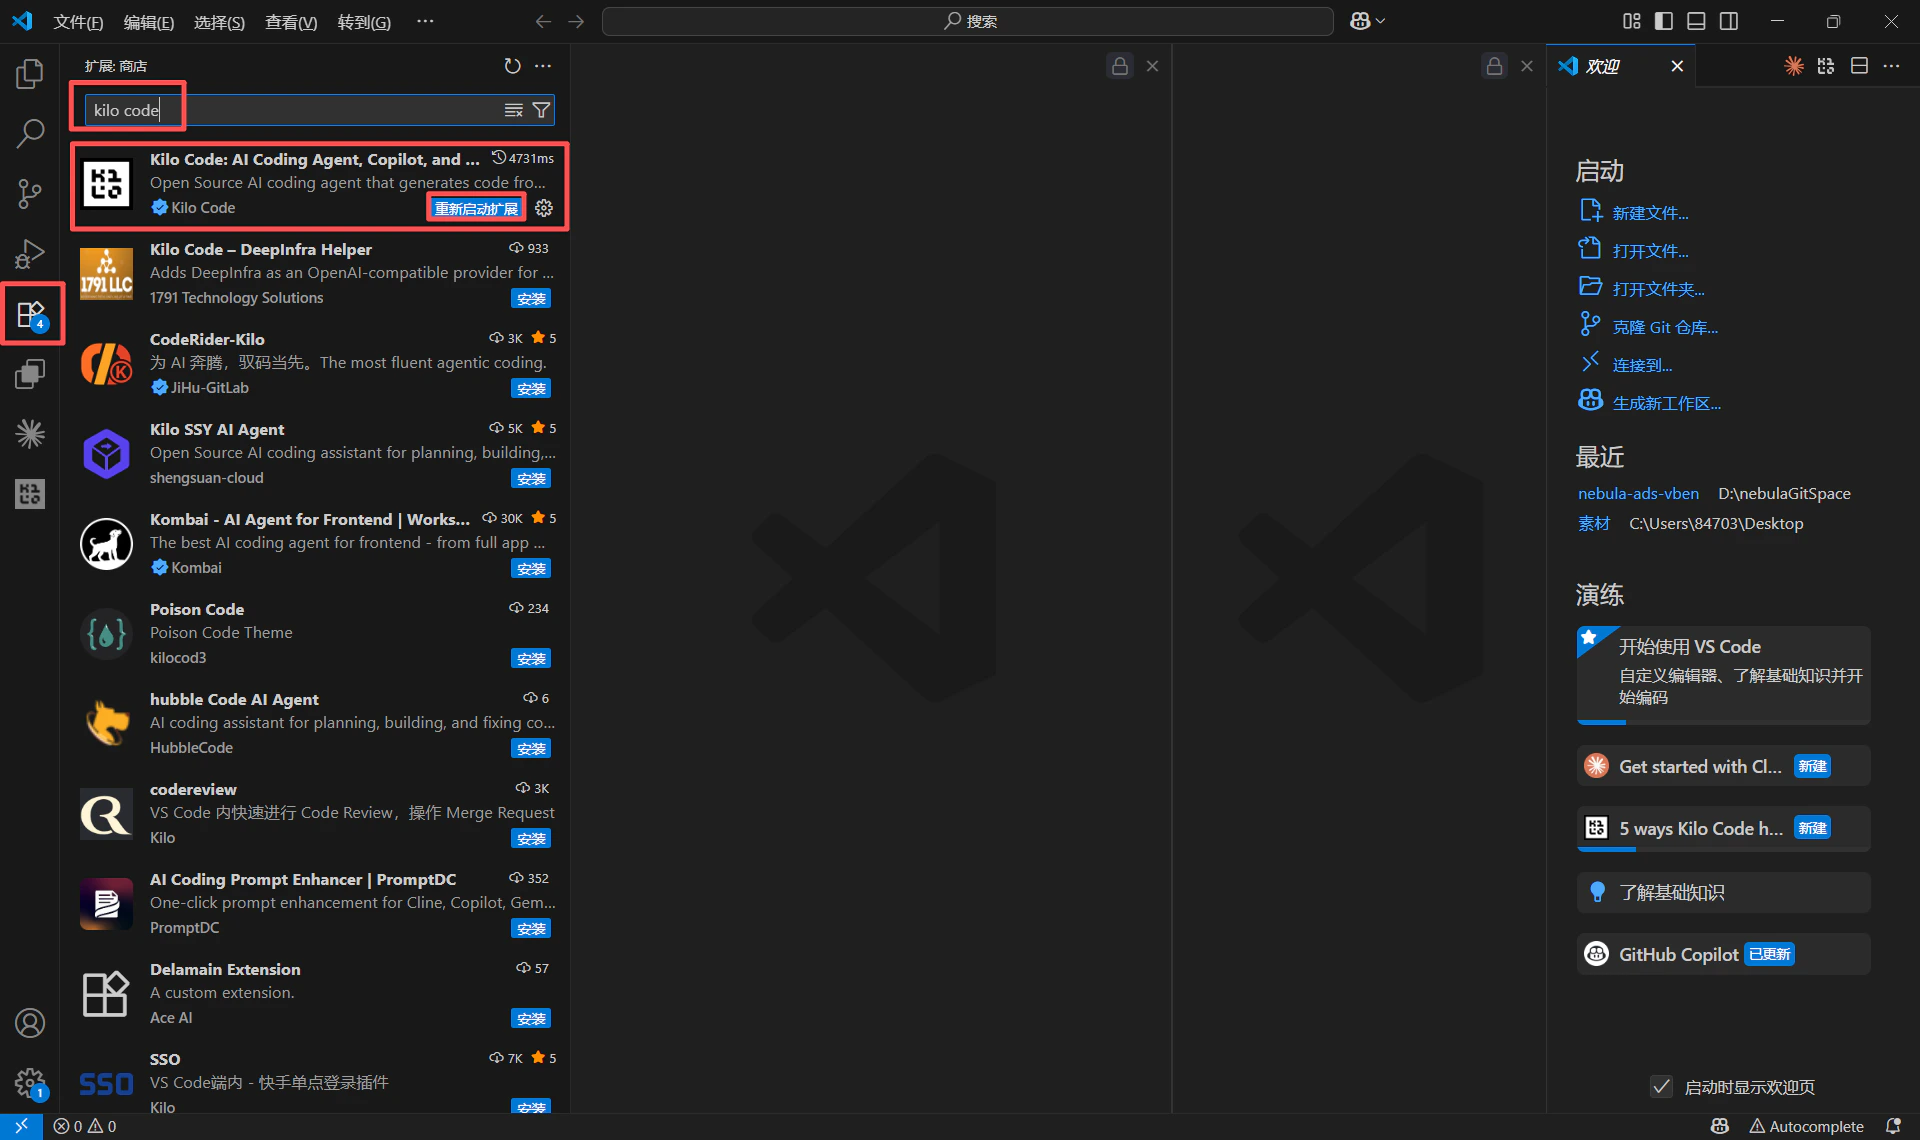
1. 打开 VS Code 编辑器,进入左侧「扩展」面板(快捷键:Ctrl+Shift+X)。
2. 在扩展市场搜索框中输入「Kilo Code」,找到官方发布的插件。
3. 点击「安装」按钮完成插件安装。
 ## 第二步:配置 API 提供商
### 2.1 打开设置面板
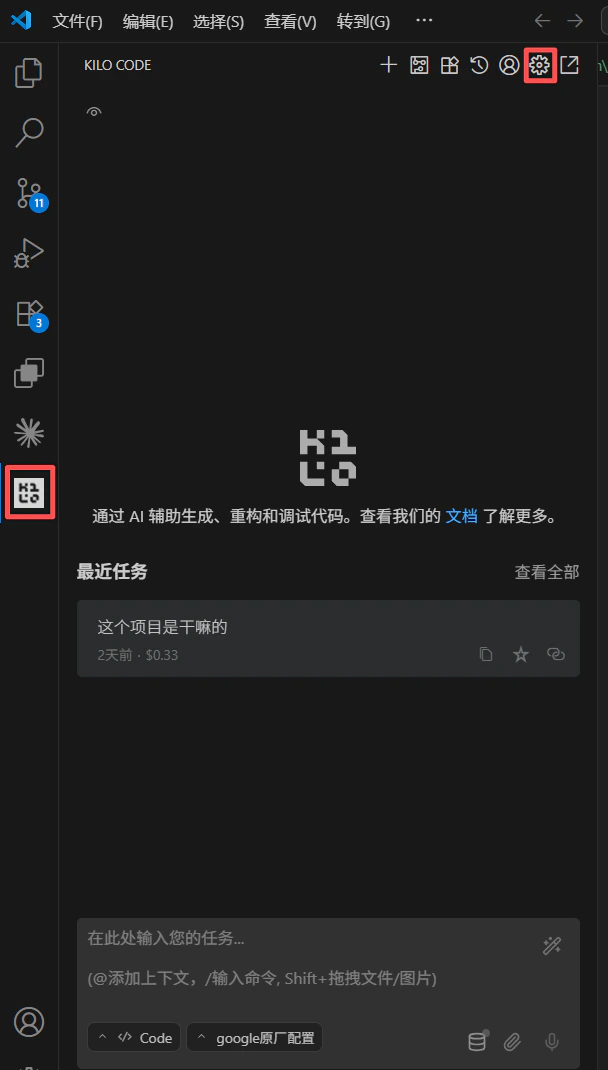
1. 安装完成后,点击左侧活动栏中的 Kilo Code 图标打开插件面板。
2. 点击顶部工具栏的「设置」齿轮图标进入配置页面。
## 第二步:配置 API 提供商
### 2.1 打开设置面板
1. 安装完成后,点击左侧活动栏中的 Kilo Code 图标打开插件面板。
2. 点击顶部工具栏的「设置」齿轮图标进入配置页面。
 ### 2.2 配置自定义供应商
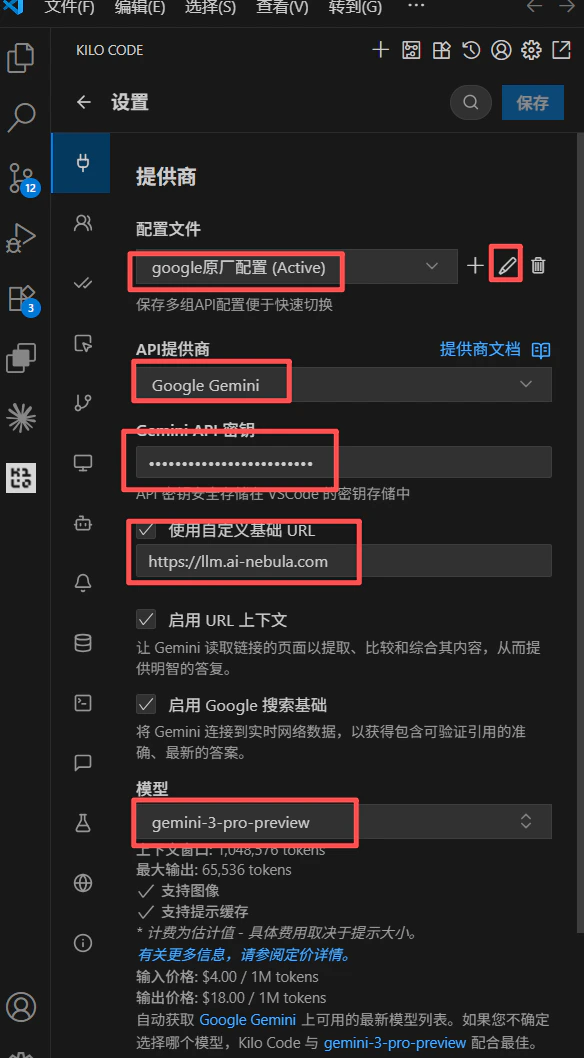
在设置面板的「提供商」部分进行以下配置:
1. **配置文件**:保持默认 `default (Active)` 即可。
2. **API 提供商**:下拉选择「Google Gemini」。
3. **API 密钥**:填写你的 API 密钥(sk-xxxxx)。
4. **模型**:输入需要使用的模型名称。
5. **基础url**:输入`https://api.leapx-hub.com`。
6. **推荐编程模型**:`gemini-3-pro-preview`。
### 2.2 配置自定义供应商
在设置面板的「提供商」部分进行以下配置:
1. **配置文件**:保持默认 `default (Active)` 即可。
2. **API 提供商**:下拉选择「Google Gemini」。
3. **API 密钥**:填写你的 API 密钥(sk-xxxxx)。
4. **模型**:输入需要使用的模型名称。
5. **基础url**:输入`https://api.leapx-hub.com`。
6. **推荐编程模型**:`gemini-3-pro-preview`。
 ## 第三步:验证连接
1. 配置完成后,打开任意代码文件。
2. 选中一段代码或在空白处,点击kilo-code图标或者使用快捷键 `Ctrl+I` (Windows) 或 `Cmd+I` (macOS) 唤起 **Inline Chat (行内对话)** 输入框。
3. 输入测试内容(例如“解释这段代码”或“你好”),如果能收到回复,说明配置成功。
## 第三步:验证连接
1. 配置完成后,打开任意代码文件。
2. 选中一段代码或在空白处,点击kilo-code图标或者使用快捷键 `Ctrl+I` (Windows) 或 `Cmd+I` (macOS) 唤起 **Inline Chat (行内对话)** 输入框。
3. 输入测试内容(例如“解释这段代码”或“你好”),如果能收到回复,说明配置成功。